The festive season brings joy for many, but often with a side of stress, especially when it comes to sending out Christmas cards to friends and family. This year I found a surprisingly simple, yet effective way to automate this process. I want to share my journey of how I harnessed the power of Comnoco to spread holiday cheer effortlessly.
The Challenge:
Every December, I find myself overwhelmed with the task of manually writing and sending Christmas cards. Keeping track of addresses, ensuring nobody was forgotten, and the time-consuming process of writing envelope addresses neatly enough to be read is daunting. My handwriting is terrible at the best of times. I knew there had to be a better way.
Step 1: Creating a Simple HTML Form
My journey began with the creation of a simple HTML form. I asked ChatGPT4 the following:
create me a simple html form, styled with Bootstrap, that collects the following information Name Address line 1 Address line 2 Address line 3 City Postcode with a submit button and clear button. that sends the data via Post as a JSON object called "data"
Here's what it gave me back:
<!DOCTYPE html>
<html>
<head>
    <title>I want a Christmas Card</title>
        <!-- Bootstrap CSS -->
    <link rel="stylesheet" href="https://stackpath.bootstrapcdn.com/bootstrap/4.3.1/css/bootstrap.min.css">

    <!-- Full version of jQuery -->
    <script src="https://code.jquery.com/jquery-3.6.0.min.js"></script>
    <script src="https://cdnjs.cloudflare.com/ajax/libs/popper.js/1.14.7/umd/popper.min.js"></script>
    <script src="https://stackpath.bootstrapcdn.com/bootstrap/4.3.1/js/bootstrap.min.js"></script>


    <script>
        // JavaScript to handle form submission as JSON
        $(document).ready(function() {
            $('form').on('submit', function(event) {
                event.preventDefault();

                var formData = {data:{
                    name: $('#name').val(),
                    address1: $('#address1').val(),
                    address2: $('#address2').val(),
                    address3: $('#address3').val(),
                    city: $('#city').val(),
                    postcode: $('#postcode').val()
                }};

                $.ajax({
                    type: 'POST',
                    url: 'your-server-url',
                    contentType: 'application/json',
                    data: JSON.stringify(formData),
                    success: function(response) {
                        console.log(response);
                        alert('Form submitted successfully!');
                    },
                    error: function(error) {
                        console.log(error);
                        alert('An error occurred.');
                    }
                });
            });
        });
    </script>
</head>
<body>
    <div class="container mt-5">
        <h2>Request a Christmas Card</h2>
        <h3>Put your details in the form below</h3>
        <form>
            <div class="form-group">
                <label for="name">Name:</label>
                <input type="text" class="form-control" id="name" name="name">
            </div>

            <div class="form-group">
                <label for="address1">Address Line 1:</label>
                <input type="text" class="form-control" id="address1" name="address1">
            </div>

            <div class="form-group">
                <label for="address2">Address Line 2:</label>
                <input type="text" class="form-control" id="address2" name="address2">
            </div>

            <div class="form-group">
                <label for="address3">Address Line 3:</label>
                <input type="text" class="form-control" id="address3" name="address3">
            </div>

            <div class="form-group">
                <label for="city">City:</label>
                <input type="text" class="form-control" id="city" name="city">
            </div>

            <div class="form-group">
                <label for="postcode">Postcode:</label>
                <input type="text" class="form-control" id="postcode" name="postcode">
            </div>

            <button type="submit" class="btn btn-primary">Submit</button>
            <button type="reset" class="btn btn-secondary">Clear</button>
        </form>
    </div>
</body>
</html>
This form collects the required information, names and addresses of my friends. All I need to do is customise it to set the URL later on to the trigger we're going to create in Comnoco.
Step 2: Display the Form
I created a fresh workspace in Comnoco called "ChristmasCards", and also a new ServiceUser with the same name. I then created a new Function Collection in the workspace called ChristmasCards, which was to contain all the functions I'd need to display the form, handle the post-back data, and generate the labels.
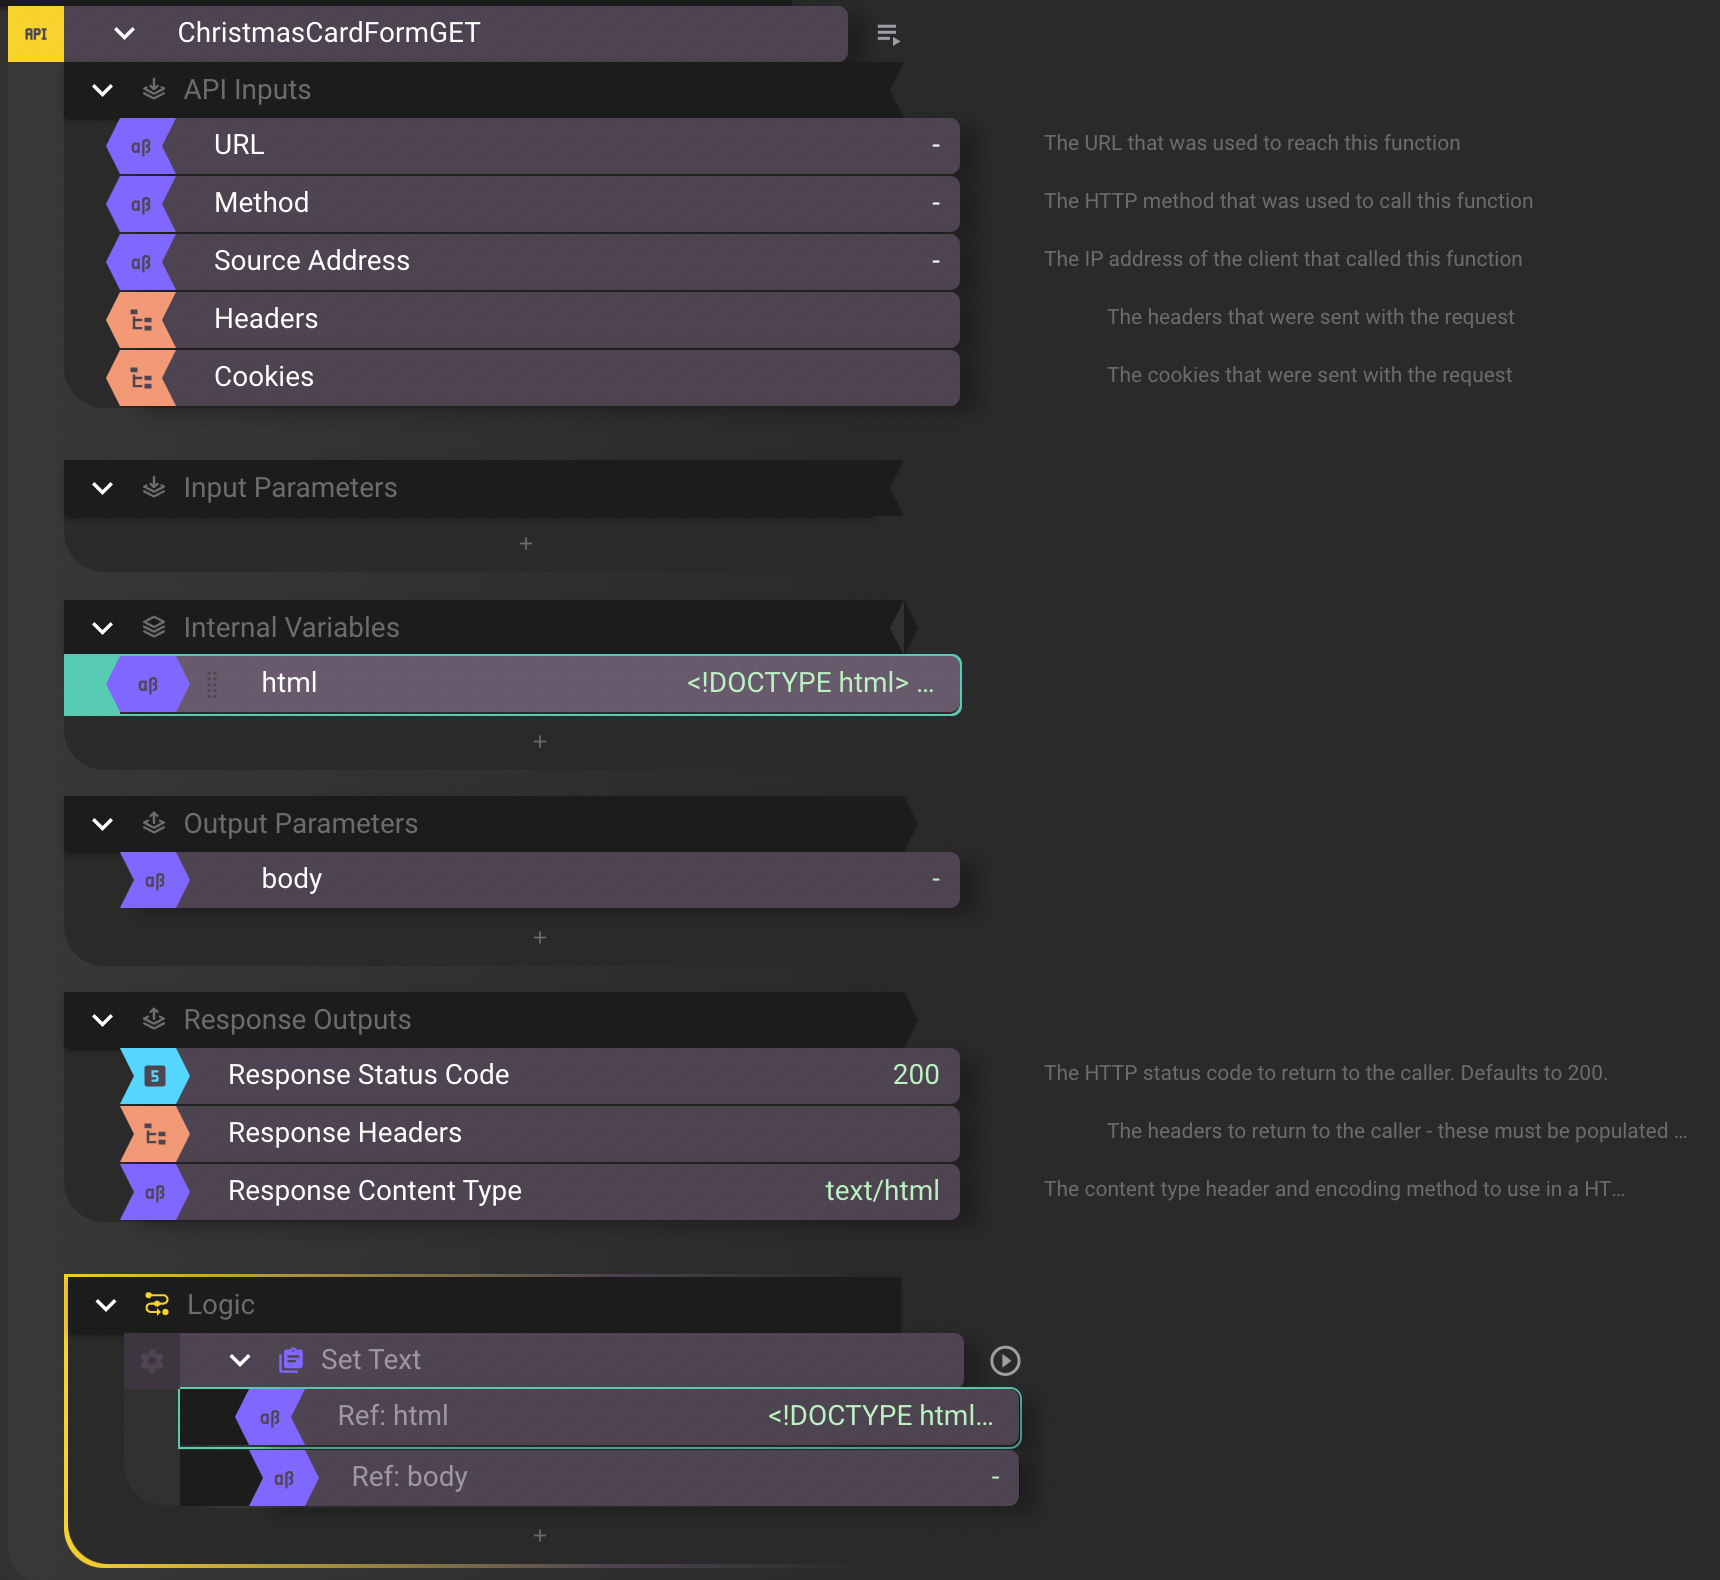
I created a new API Function, with a single Internal Variable called "html", and copypasted the HTML form output from ChatGPT into it. I created an Output Parameter as Text called 'body'.
Setting the Response Output's Response Content Type to text/html means that the trigger will return the content of the response as a webpage that can be directly interpreted by the visitor's browser. Then in the Logic tree, I placed a Set Text to copy the Internal Variable called html into the Output Parameter called 'body'
Step 3: Handle the POST data
Having gathered the data in the form, the javascript in the page will send the entered values as a JSON object in this format:
{
  "data": {
    "name": "Toom",
    "address1": "Zoom",
    "address2": "Foom",
    "address3": "Loom",
    "city": "Noom",
    "postcode": "S4N TAA"
  }
}
So all that's left to do (ha!) is accept the POST data, and store it in Supabase.
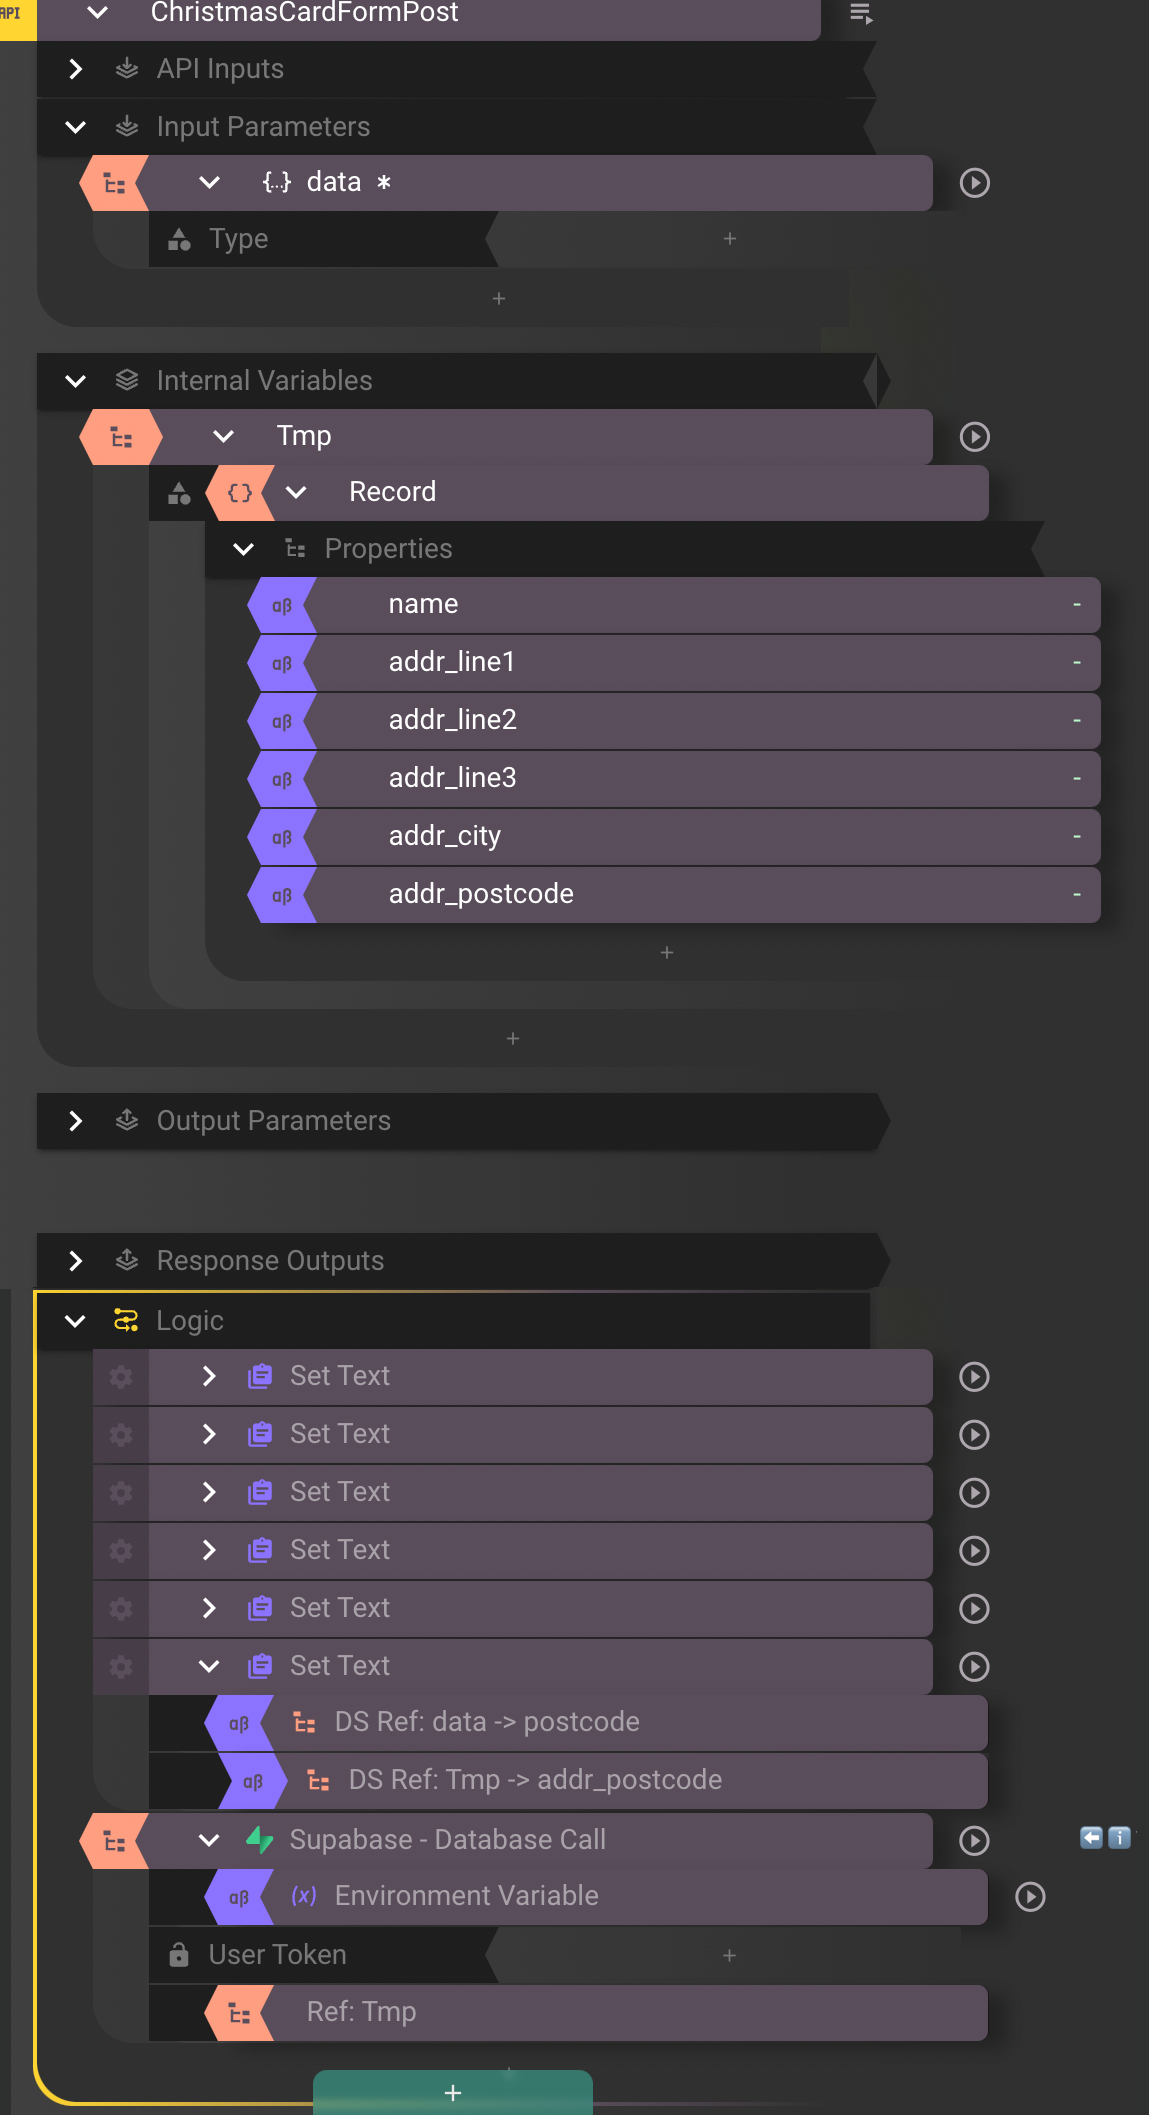
I had to include a bunch of Set Text blocks which reformat the data structure passed in by the POST data, because the next bit, the label generator, expects subtly different field names, and I didn't feel like going back and changing every referenced value in the .docx template. Also, because this blog post is written after the fact, it should be clear that a bit more planning would've made things easier in the long run.
The Supabase database call is just an Insert to create a new row in the database from the data structure called "Tmp" that holds the record format.
Supabase Configuration
I created a new Table called "ChristmasCards" in an existing Supabase project.
create table
  public."ChristmasCards" (
    id bigint generated by default as identity,
    created_at timestamp with time zone not null default now(),
    name text null,
    addr_line1 text null,
    addr_line2 text null,
    addr_line3 text null,
    addr_city text null,
    addr_postcode text null,
    constraint ChristmasCards_pkey primary key (id)
  ) tablespace pg_default;
Step 4: Creating Mailing Labels
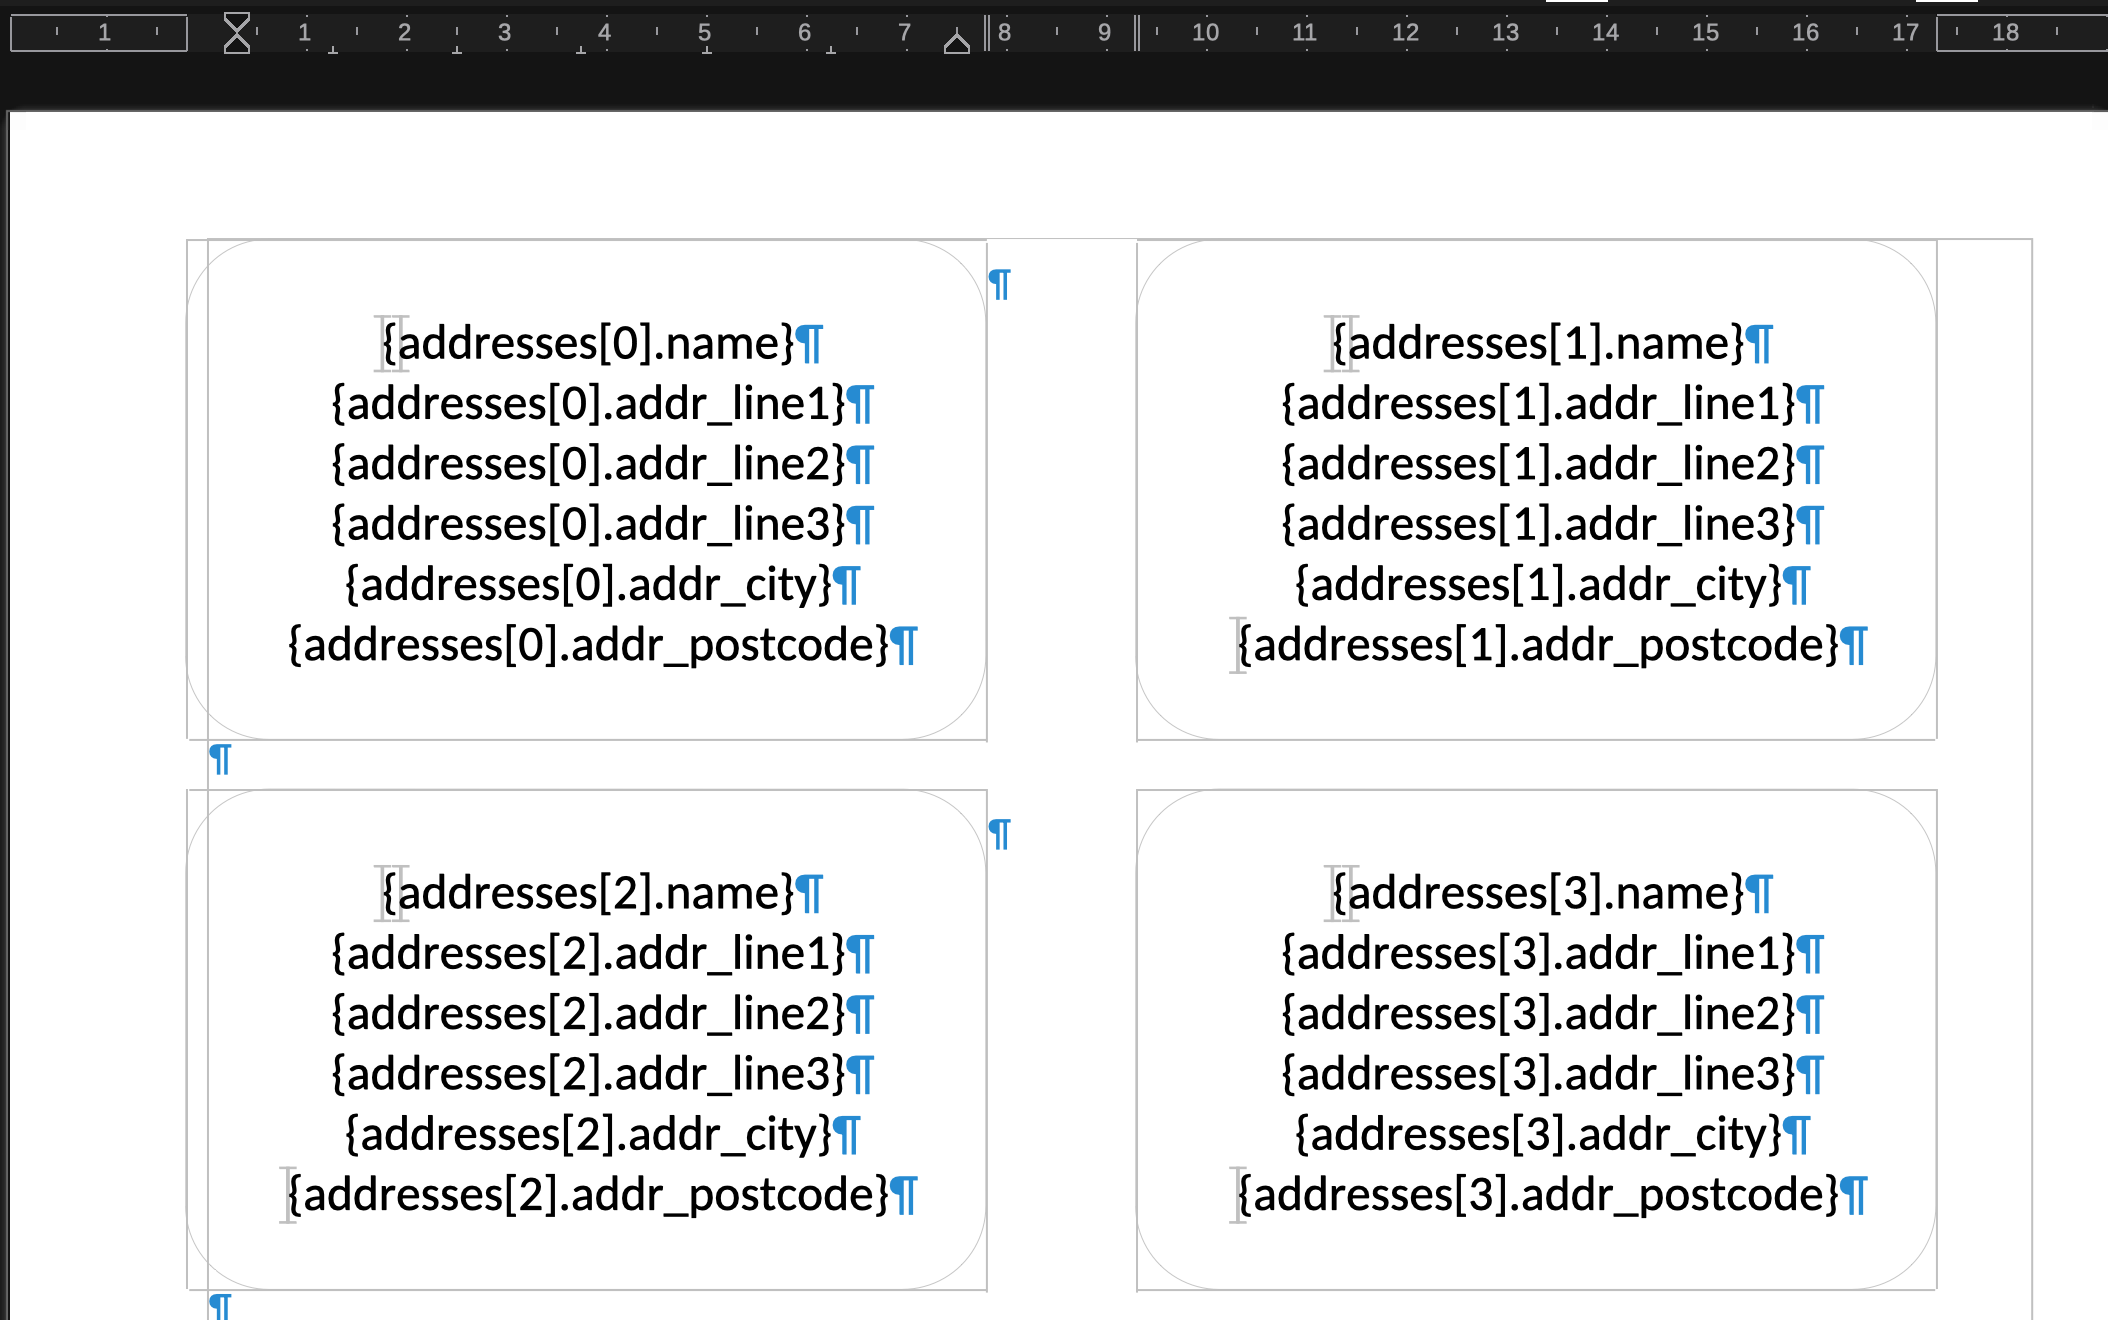
This was actually the first step I did this morning when I started playing around with this as an idea. Given that I have some Avery mailing labels (80x50, 10 labels per sheet, in case you're curious), and Avery are good in that they publish .docx templates for most, if not all of their printable media. I was able to download the correct template for the labels I have, and populate the template file with {format} placeholders that the Comnoco Docx to PDF can interpolate.
The Docx template contains a bunch of field mappings, one per field, per label, so that it looks like
address[id].name
address[id].addr_line1
address[id].addr_line2
address[id].addr_line3
address[id].addr_city
address[id].addr_postcode
and so on, across the page.
Within the Document Template in Comnoco, it takes the uploaded .docx template, and the Template Data input as such:
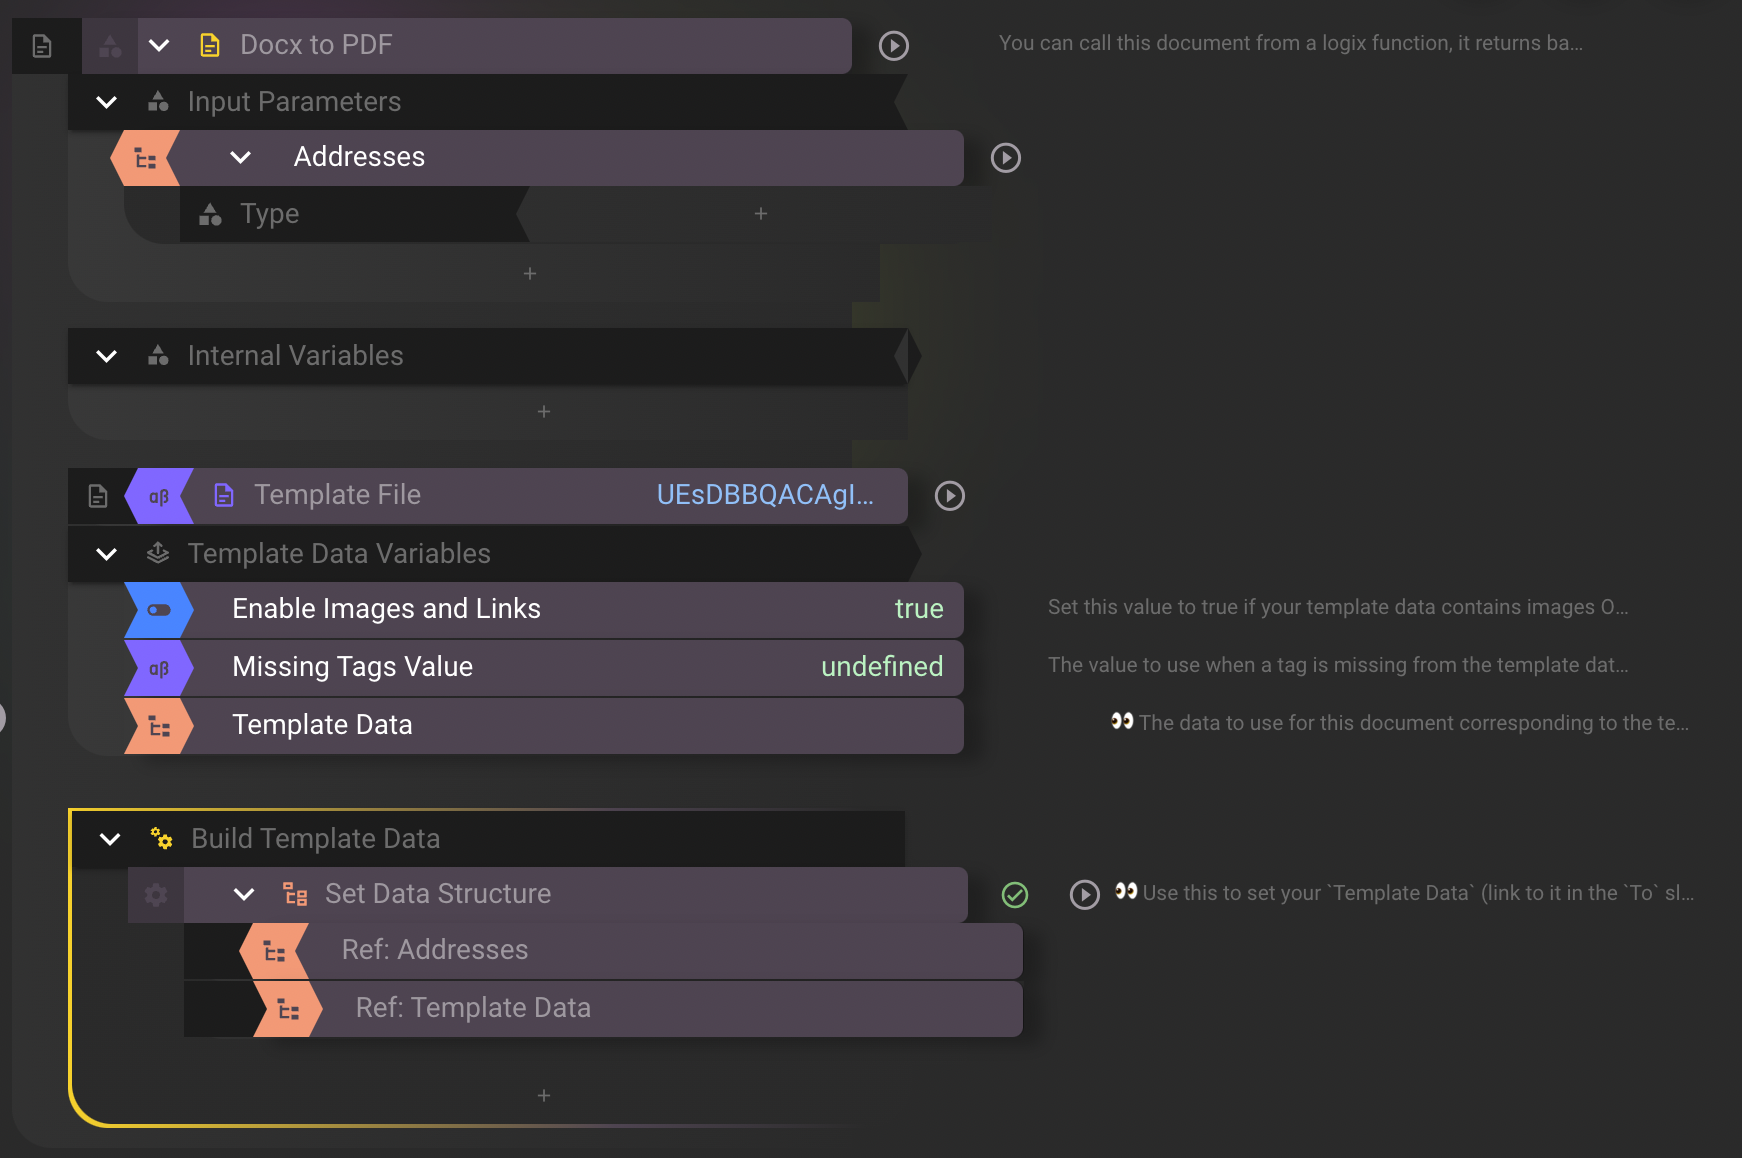
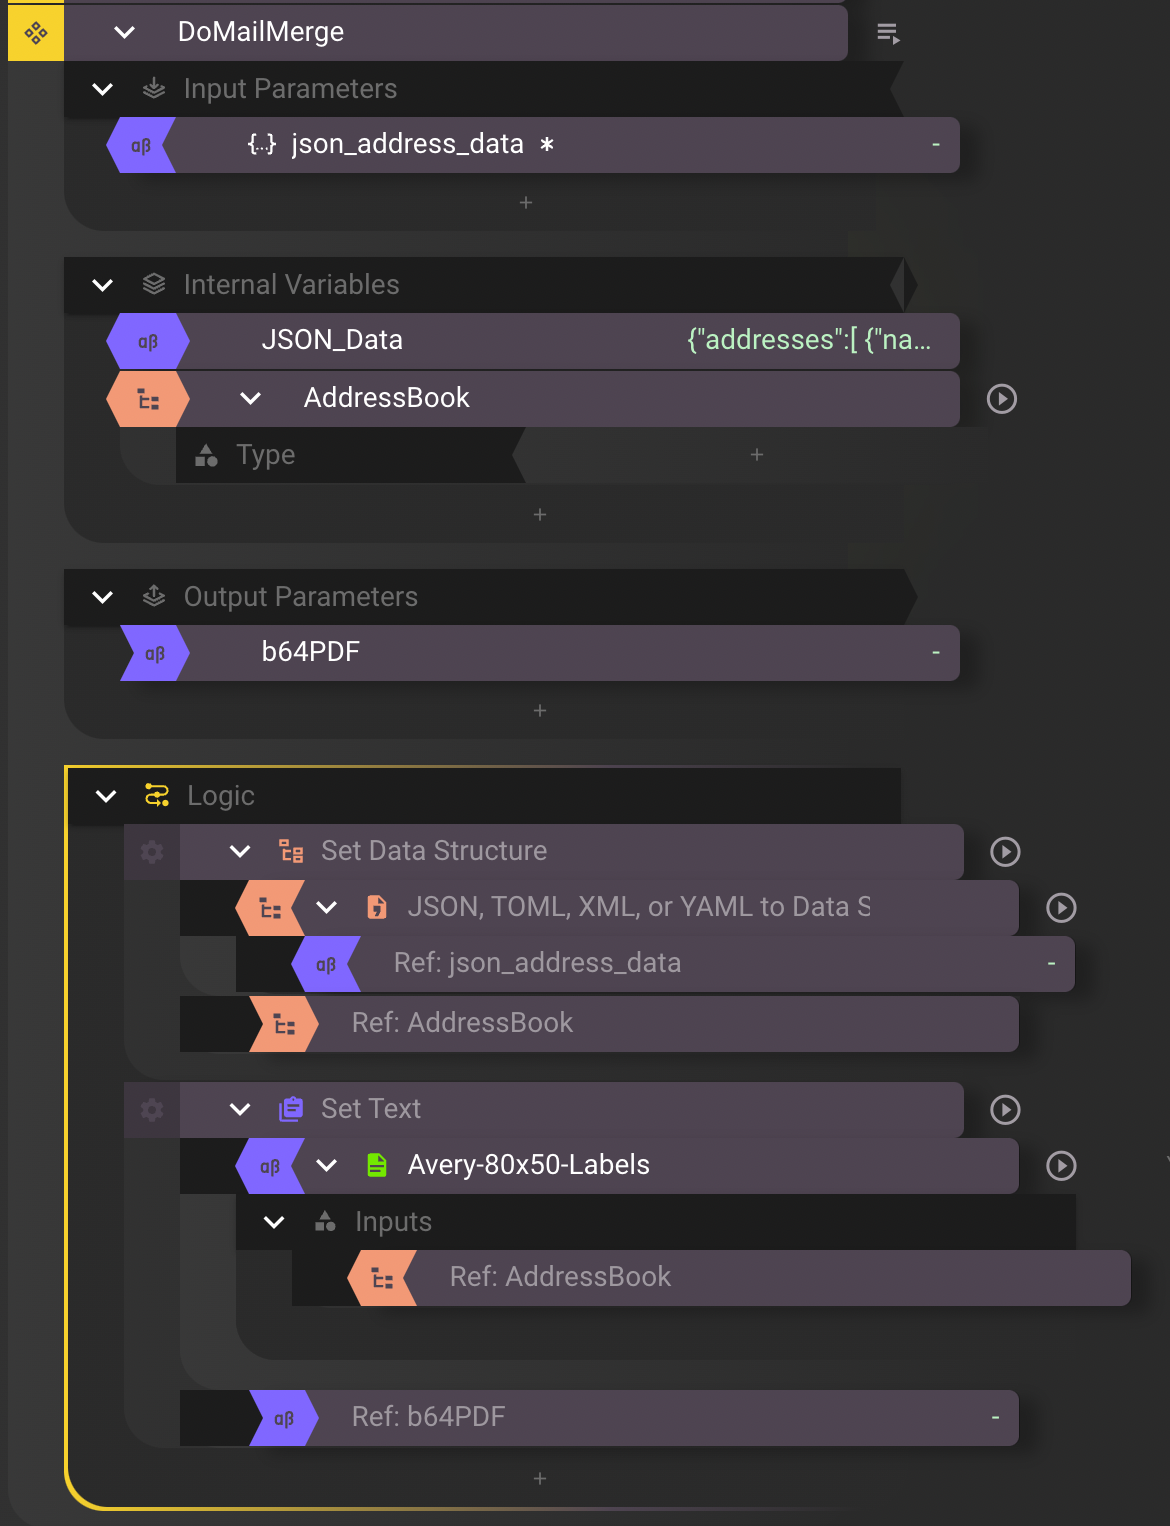
I created a new Component Function called "DoMailMerge" which would take a JSON object in the format:
{"addresses":[...]}
and use the Docx template to create a base64 encoded representation of a PDF of labels, with one entry per label.
The original plan was to make this able to accept data either via Comnoco or existing address lists I have, hence the JSON input, so it's a bit more versatile.
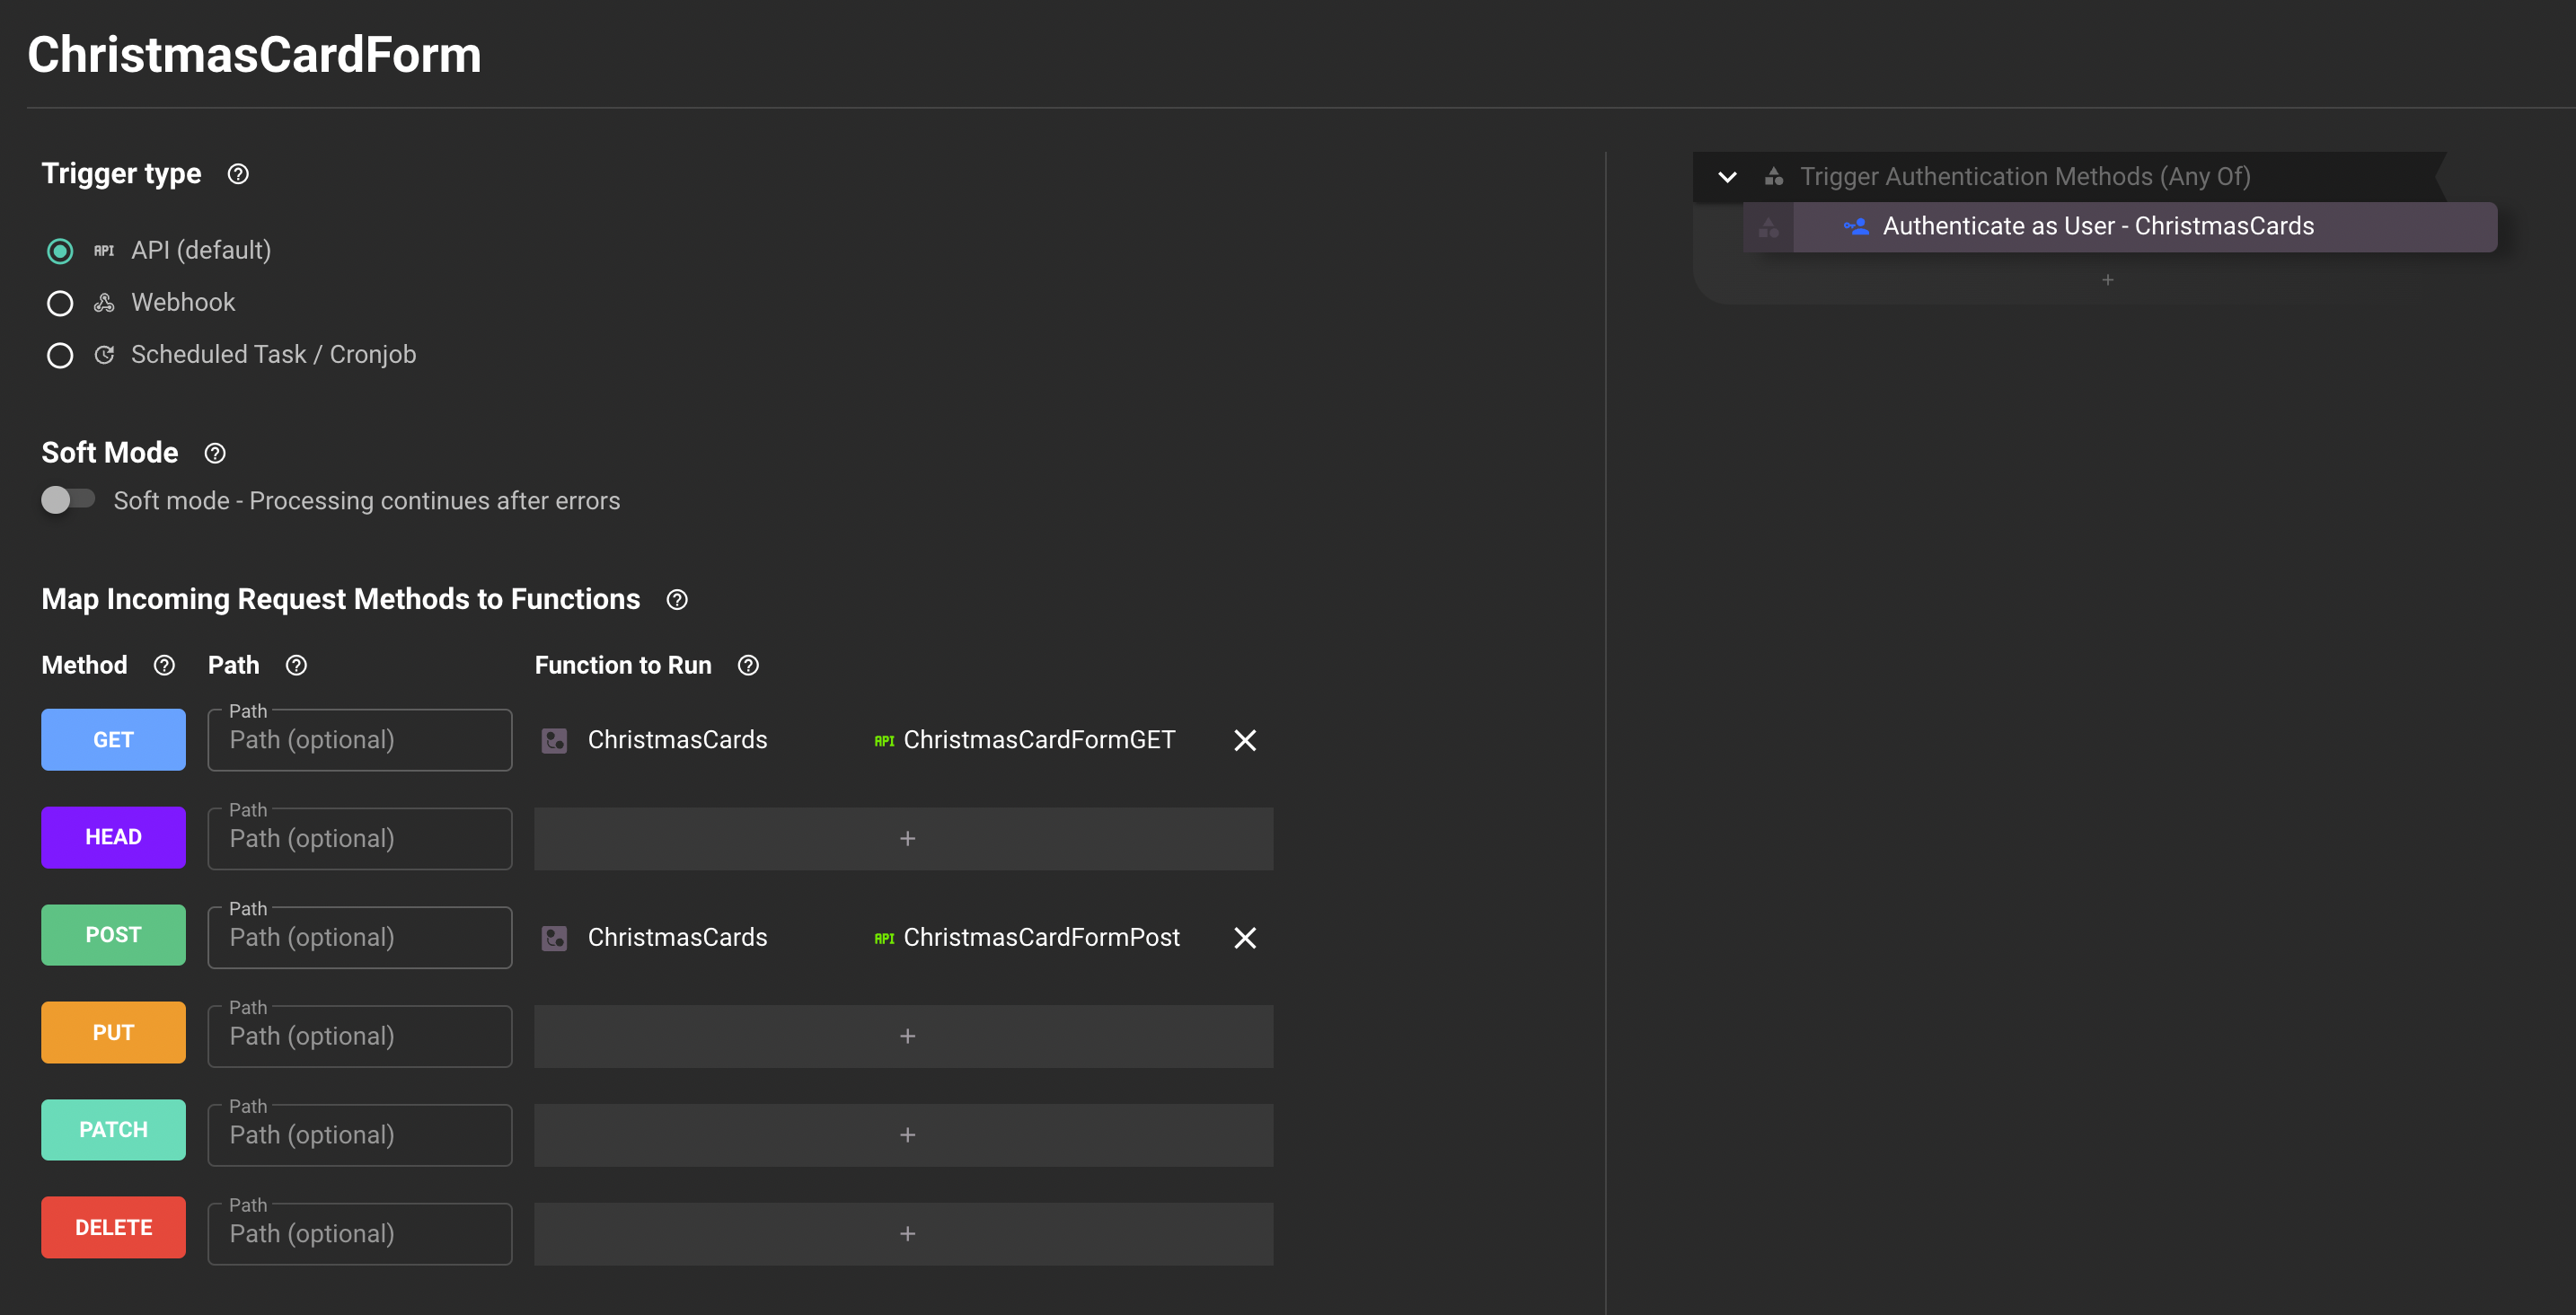
Step 4b: Creating Triggers, and Connecting Functions
Triggers connect Comnoco Functions to incoming HTTP requests. In this project, I use two triggers, one which has 2 request method mappings, GET and POST. GET mapping displays the HTML form from Step 2, and POST handles the returned address data from Step 3. These both use a ChristmasCards Service User so that the user doesn't have to provide any authentication or API key.
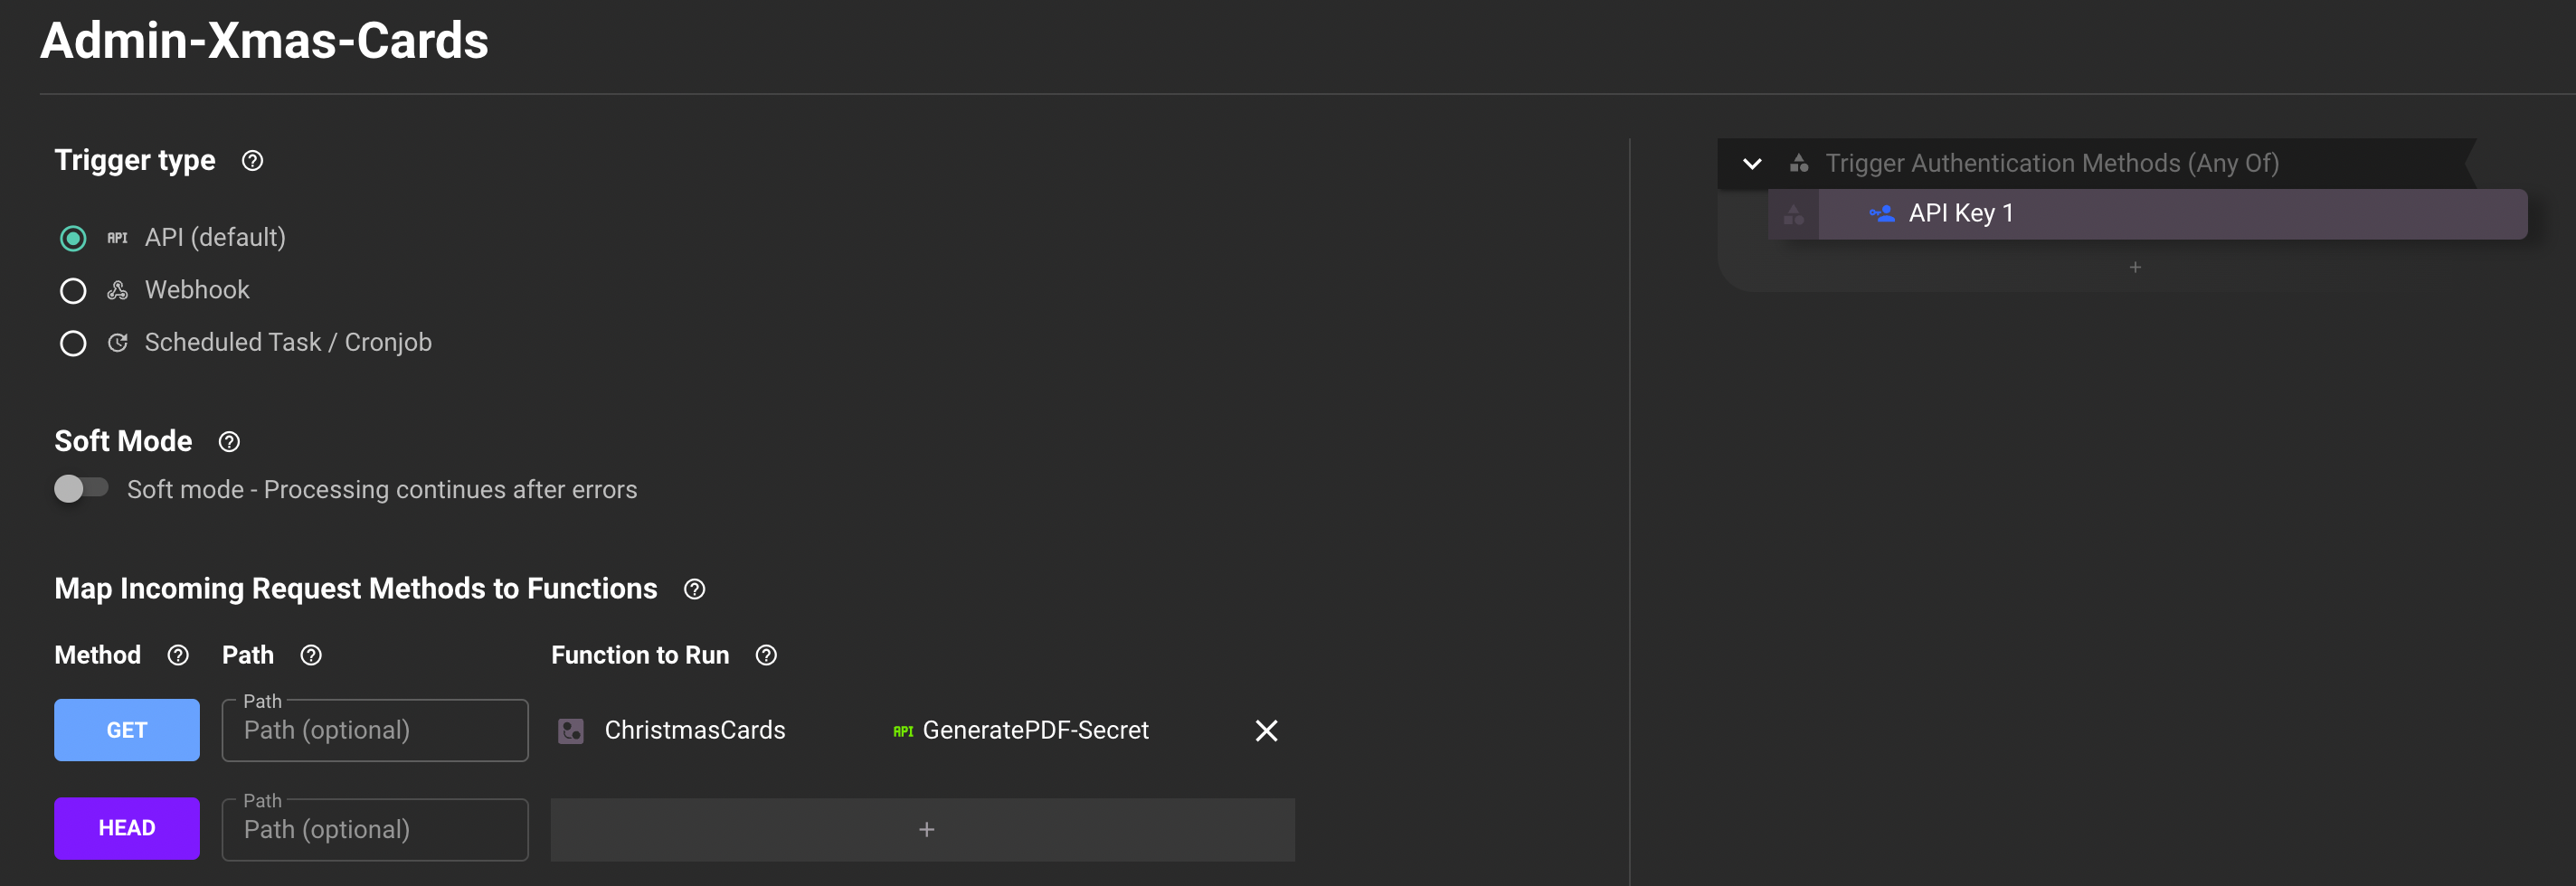
The second Trigger uses an API key I created, so that only I can access the PDF generation function.
Step 5: Actually rendering the PDF from Supabase data.
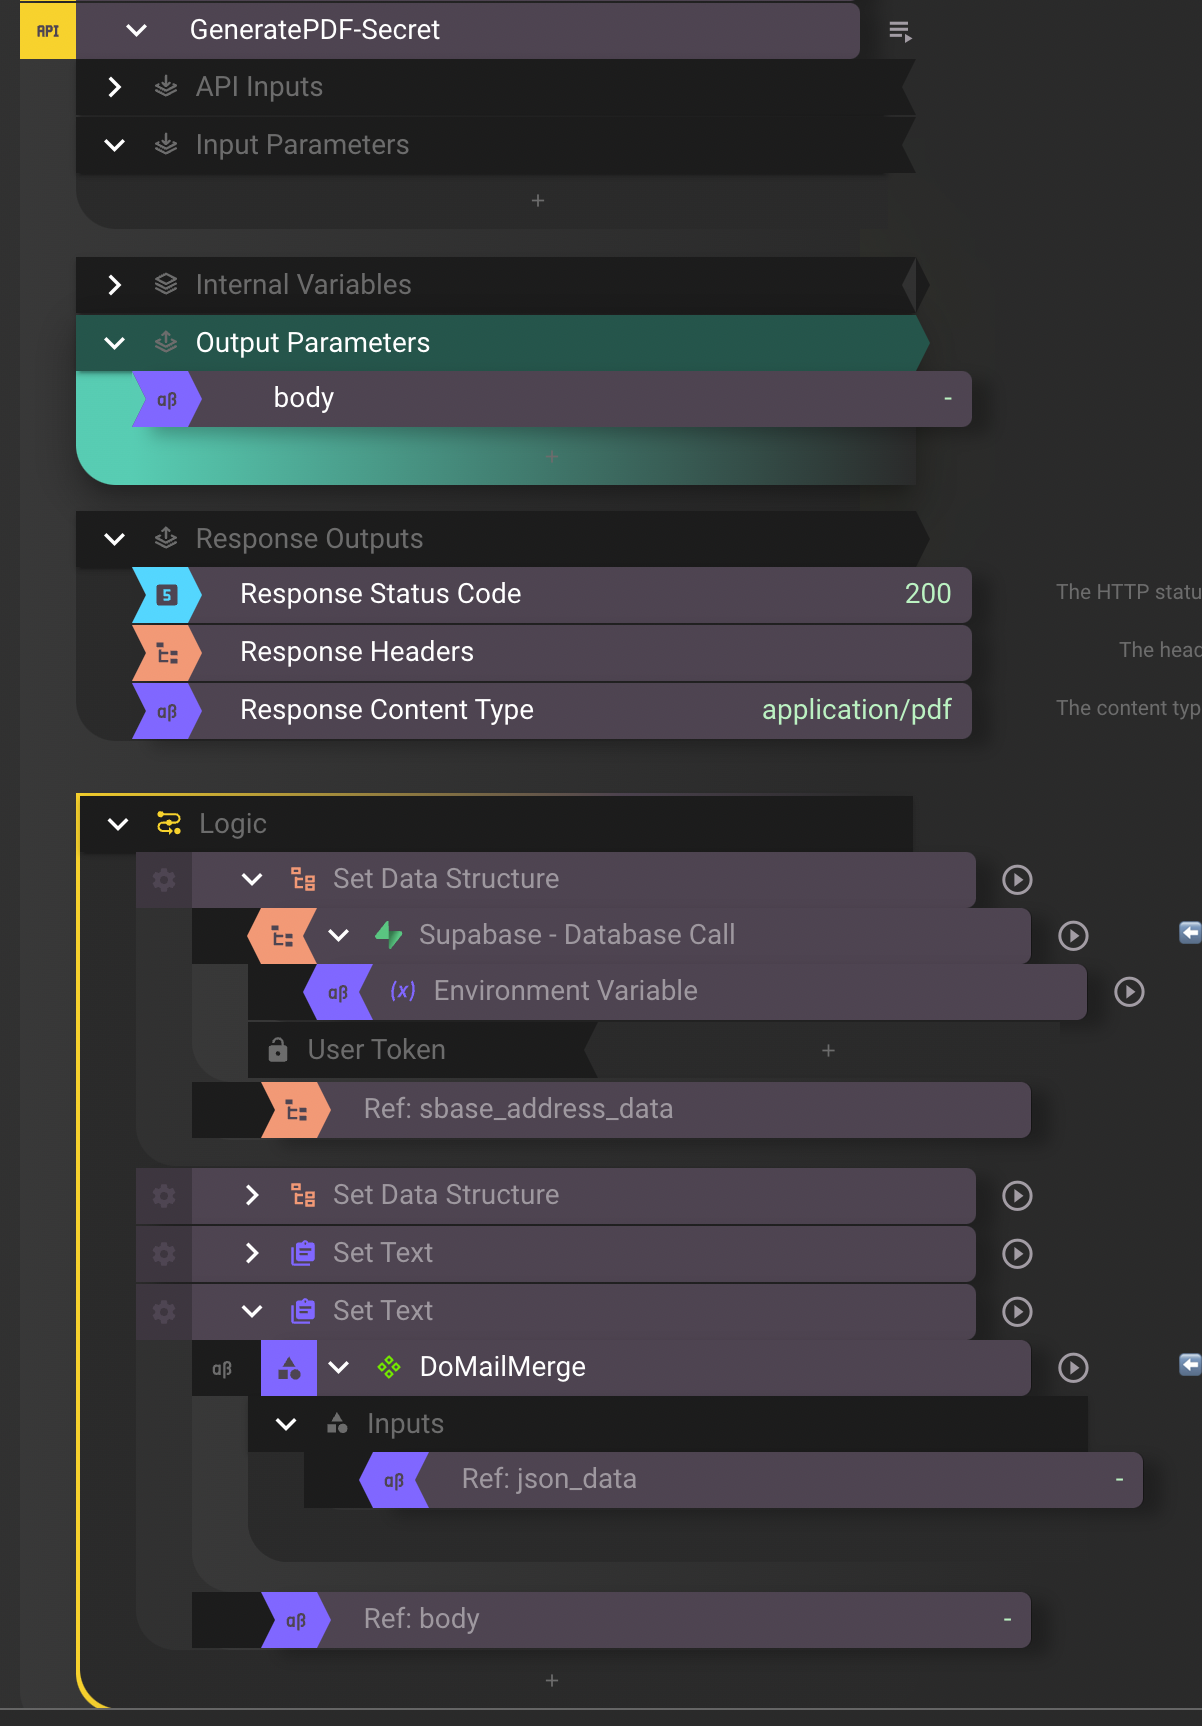
The final step was to write another API function, which does a Retrieve lookup on the ChristmasCard table in Supabase, pull the data out, reformat it to the expected format for the DoMailMerge Component Function, and return a PDF of labels.
Because the 'Docx to PDF' block returns a base64 encoded representation of a PDF file, getting an actual PDF file out of Comnoco is pretty easy, I just set the Response Content Type in the API Function to be application/pdf and copied the base64 data from DoMailMerge component function to a single output parameter labelled 'body'.
Then all I have to do to generate the PDF ready to be printed is run a command line cURL command: curl -XGET -H 'API-KEY:<REDACTED>' https://trigger.comnoco.com/t/<ALSO REDACTED>/Admin-Xmas-Cards --output mailmerge.pdf
Then I can print the PDF, and stick them to envelopes. Job Done!
Downloadable Assets
- ChristmasCards.Logix (Contains my Logix definitions outlined in this article)
- Avery_80x50-R-Comnoco.docx (Avery label template populated with placeholders)
In conclusion
The tedious task of sending christmas cards was made less arduous by this automation process. What used to be a time-consuming task, fraught with painful thumb cramps from holding a biro for an hour, became a streamlined, efficient and enjoyable experience. This journey not only saved me time, but also allowed me to focus on the personal touches that make holiday greetings special. Automation, often seen as impersonal, proved to be a valuable tool in preserving the warmth and personal connection of the festive season.
Embracing technology, and no-code automation in our personal lives can lead to surprising benefits. This experience has inspired me to explore other aspects of my life where automation can bring efficiency and joy. The possibilities are endless, and I'm excited to see what other tedious personal-life processes I can optimise and automate with Comnoco.